1st South African Infantry Division
On 13 July, the 1st South African Brigade Group under command of Colonel John Daniel was issued its movement order and it assembled at Zonderwater for the farewell parade, with General Smuts taking the salute – ironically, that Sunday being celebrated as "Delville Wood Day".
The Italians maintained a well established outpost at Turbi Hills, from which they had clear observation of any vehicle or troop movements in the Dida Galgalla.
[17] 2nd and 5th Brigades crossed the Abyssinian border north of Dukana late afternoon on 31 January 1941, moving in parallel columns to assault the Italian positions in the Mega-Moyale complex.
[nb 4] The Italians had well established and entrenched advance positions at Goai Crater, El Gumu and Hobok – which were to be taken before the main forces at Mega-Moyale could be attacked.
The next day, 3rd Transvaal Scottish and the armoured cars attacked Fort Hobok, sited on a ridge 30 km west of El Gumu supported by artillery.
Having two salients extending into Ethiopia, Cunningham and Brink decided to consolidate and to secure their lines of supply in face of the oncoming rainy season which would make the Chalbi desert impassable.
Despite incoming artillery fire, the Irish and Scottish regiments advances progressed well – but there was no sign of the 2nd Brigade who had not yet crossed the start-line, threatening to undermine the planned attack.
It was only after the third day that the 2nd Brigade managed to reach their designated start-line due to poor navigation and the failure to identify serious terrain obstacles on their line of advance during reconnaissance.
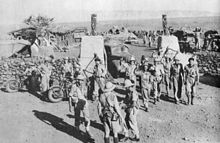
[19] Mega fell with 1,000 Italian and African soldiers being captured on 22 February, and later that day one of the irregular companies attached to 2nd Brigade entered Moyale unopposed.
[20] By the time Moyale fell, allied forces had captured Mogadishu to the east and this success encouraged General Wavell to advise Cunningham that the South African division should be readied to deploy to Egypt at short notice.
[26] Severe administrative problems, as well as organizational issues related to integration of the division into the Western Desert Force, caused discontent and eventually lead Gen.
Smuts claimed that the manpower shortages were due to troops being retained for protection duties in East Africa and that a lack of shipping precluded the arrival of a further 3,000 men and he rejected the idea of reducing the South African forces into divisions of two brigade strength, as was recommended by Wavell.
[28] In addition, Brink continued to express his displeasure at the fact that the 1st Division was being utilised to construct defensive positions, instead of training in order to prepare for operations.
[30][nb 7] At the end of October, Brink advised XXX Corps that 1st Division would not be ready to participate in the preparatory exercise as a prelude to Crusader – and that he required an additional 21 days for training.
The Western Desert Force was reorganised and renamed the Eighth Army under the command of Lieutenant-General Alan Cunningham and at this stage, the division comprised only two brigades.
[32] The division advance commenced at 0600 on 18 November with uneventful progress through the empty desert, save for two air attacks by Italian aircraft (Point 1 on Map 3).
El Gubi had now become a lesser objective after the capture of Sidi Rezeg and early morning on 21 November, the 21st and 15th Panzer had withdrawn to the north-west, not aware of the Allied advance to their south[34] – creating the impression within the division, that the Axis forces had already been defeated.
[46] Against the German tanks, the South African infantry had no real means of defence with limited Anti-Tank capabilities, they were compelled to use 25-pounders in a direct fire role.
[49] ...the attack started well, but soon came up against a wide artillery and anti-tank gun screen, which the South Africans had formed at a surprising speed between Haiad and Muftah.
Guns of all kind and sizes laid a curtain of fire in front of the attacking tanks and there seemed almost no hope of making any progress in the face of this fire-spewing barrier.
[52] Attempts to join up with the New Zealanders were repeatedly blocked (at one stage Gen Norrie himself lead a combat group from the SA Brigade) by Axis actions.
[56] By 1145 General Norrie stated that the "Matruh Stakes" had officially started – as 8th Army A and B Echelons hurriedly withdrew east (Point 5 Map 3).
By early December, Rommel had withdrawn to a line of defences east of Tobruk at Gazala, and the division occupied defensive positions at Mersa Matruh.
[77] At the same time, Ritchie had ordered the balance of Eighth Army to withdraw to the defensive positions at Mersa Matruh, some 100 miles east of the frontier, leaving Tobruk to hold out and threaten the Axis lines of communication in much the same way as in 1941 – This became known as the Gazala Gallop.
Auchinlecks order effectively meant that Pienaar could only hold the box with one under-strength brigade[80] Before these troops could be returned, battle was joined with the 90th Light Infantry Division in the early morning hours of 1 July.
[89] For what was to become the final South African assault on the Axis forces (Operation Lightfoot), the division was tasked attack on a two-brigade front to secure the southern end of Mieiriya Ridge.
The divisional artillery, reinforced by three troops from X Corps was to fire a fire-plan of timed concentrations – using smoke on the intermediate and final objectives to cover re-organisation and to help with direction finding.
[103] On the night of 2/3 November, the Australians noticed signs of withdrawal by Axis units in the coastal salient and by 1000 Montgomery had received similar reports from the south.
The 1st SA Division played no role in this phase of the operation – but the South African armoured cars attached to XXX Corps were actively involved in the attempted destruction and subsequent pursuit.
The regiment awoke on 4 November to silence and the absence of gunfire, save for the sound of Allied vehicles advancing west in pursuit of the retreating enemy.