2nd Sussex Rifle Volunteers
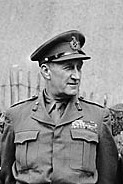
[6][9][12] The elder Barttelot was succeeded in the command by Sir Henry Fletcher, 4th Baronet, former lieutenant in the Grenadier Guards who had been appointed a supernumerary lt-col in the battalion on 6 May 1874.
The Stanhope Memorandum of December 1888 proposed a more comprehensive Mobilisation Scheme for Volunteer units, which would assemble in their own brigades at key points in case of war.
[6][18] Colonel Sir Henry Aubrey-Fletcher commanded this brigade from 1897 to 1904[13] After Black Week in December 1899, the Volunteers were invited to send active service units to assist the regulars in the Second Boer War.
The service company joined 1st Bn Royal Sussex and saw action at Welkom Farm, Zand River, Doornkop, Johannesburg, Pretoria and Diamond Hill.
[6] After the Boer War, a Royal Commission on Militia and Volunteers was established in 1903, chaired by the Duke of Norfolk, who had been promoted to lt-col commandant of the 2nd VB on 24 December 1902.
[4][5][7][6][29] HQ moved from its old location at Teville Road, Worthing,[18] to the Drill Hall at Park Street, Horsham,[30] before the outbreak of the First World War.
[43][44] In September the Home Counties Division began to send battalions to Gibraltar to relieve the Regular garrison for active service with the British Expeditionary Force (BEF) on the Western Front.
The 1/4th Sussex advanced steadily in extended order, every man with an extra 100 rounds of ammunition and the rear company carrying entrenching tools.
This forward position was untenable because of the burning scrubland and enfilade fire from the right flank, so the battalion fell back and consolidated a line of old Turkish trenches facing Scimitar Hill.
The battalion (now simply the 4th Royal Sussex, since the 2/4th and 3/4th Bns had disappeared, see below) slowly regained its fitness from regular route marches, and strength from the receipt of several reinforcement drafts from home.
Shortly afterwards, fog rolled in from the sea, slowing the advance, but the brigade pushed on to Esh Sheluf ahead of schedule and 4th Royal Sussex secured the most prominent knoll on the Es Sire Ridge by 05.10.
By 13.30 the brigade had captured 'The Labyrinth', a maze of entrenched gardens, but now the battalion, advancing up the centre of the Es Sire Ridge, suffered heavy casualties, lost its commanding officer (Lt-Col Ashworth) killed, and fell back in some disorder from the crest.
The objective for 160th Brigade was Samson Ridge, 4th Royal Sussex advancing in support of 2/10th Middlesex Regiment, who became pinned down about 300 yards (270 m) short of the Turkish redoubt at the top.
At the beginning of December 53rd (W) Division rejoined the fighting, advancing up the Hebron road through the Judean Hills in fog and rain to threaten Jerusalem from the south.
From 20 January to the end of February the battalion was alternately working on road repairs and holding the line, occasionally taking another small piece of territory without serious opposition.
The battalion made a small advance against weak opposition on 11 March, but a more serious attack that afternoon was cancelled, and 4th Royal Sussex returned to bivouacs on the Mount of Olives.
[46][47][53][85][86] The success of the German Spring Offensive on the Western Front led the British Expeditionary Force (BEF) to demand urgent reinforcements from Palestine.
Next day the 34th Division joined in the French counter-attack (the Battle of the Soissonnais and the Ourcq); 4th Royal Sussex was in brigade reserve in a wood and immediately came under German shellfire and began suffering casualties.
The battalion pushed forward through a German defensive barrage that included Tear gas, and had progressed over a mile by 06.00, when a halt was made on the Green Line.
In the evening, 4th Royal Sussex pushed up the Wytschaete Ridge to within 10 yards (9.1 m) of German positions, despite the darkness and ground devastated in earlier battles.
The 4th Royal Sussex reformed at Park Street, Horsham, still commanded by Lt-Col William Campion, DSO, MP, with his father as Hon Col.
The Germans established bridgeheads across the river at dawn on 20 May, and next day 4th Bn was sent forward to Anseghem under shellfire, losing its first casualties, including three company commanders (the Duke of Norfolk had already been evacuated to hospital sick).
That night the battalion was ordered to destroy most of its vehicles and retire some 10 miles (16 km) to Mont des Cats, a strong position already held by the divisional artillery and support troops.
Initially, the battalion was given a counter-attack role in the event of a seaborne invasion and was kept at high level of readiness, with constant training under Lt-Col Whistler.
At first it was in the Nile Delta defences in the rear, then on 14 August the division was called forward by Gen Montgomery and the following day assigned to XIII Corps under Lt-Gen Horrocks.
The attack was launched at 22.30, and 4th Royal Sussex crossed ground already held by 1st Gordon Highlanders, leading to a clash and some casualties from friendly fire.
(During the final part of the battle, 'Operation Supercharge', on 2 November, the 5th (Cinque Ports) Bn, Royal Sussex, of 133rd Bde put in a successful attack on 'Snipe' as the Axis defences began to crumble.)
[4][7] In April 1940, three of the new duplicate TA divisions under training, including the 12th (Eastern), were sent to France to act as labour troops to work on airfields and Lines of Communication (LoC).
[143] In January 1943 it joined VIII Corps, earmarked for the planned invasion of Normandy (Operation Overlord), but it was not included in the order of battle for 21st Army Group when that was formed later in the year.
[158] A memorial chapel in St Mary the Virgin Church, Horsham, commemorates those from the parish, the 4th Royal Sussex, and Collyer's School who died in the Second World War.