Battle of Halidon Hill
In 1337 the Hundred Years' War broke out between France and England which allowed David II to consolidate his position in Scotland.
[1] After the 30 years of warfare that followed, the newly crowned 14-year-old King Edward III (r. 1327–1377) was nearly captured in the English disaster at Stanhope Park.
In 1331, under the leadership of Edward Balliol and Henry Beaumont, Earl of Buchan, the disinherited Scottish nobles gathered in Yorkshire and plotted an invasion of Scotland.
[3] Almost immediately, Balliol granted Edward Scottish estates to a value of £2,000 (£2,100,000 in 2025 terms[note 1]), which included "the town, castle and county of Berwick".
Edward promised to discuss the matter with both Pope John XXII and King Philip VI of France (r. 1328–1350).
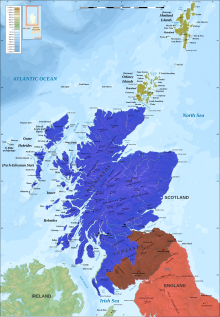
[10][11] Edward's chosen target was Berwick: a Scottish town on the Anglo-Scottish border, astride the main invasion and trade route in either direction.
[12] According to a contemporary chronicle, Berwick was "so populous and of such trade that it might justly be called another Alexandria, whose riches were the sea and the waters its walls".
[13] It was the most successful trading town in Scotland, and the duty on wool which passed through it was the Scottish Crown's largest single source of income.
[15] During centuries of war between the two nations battles had been rare, as the Scots preferred guerrilla tactics and border raiding into England.
[27][28] A scorched-earth policy was applied to the surrounding area to deny supplies for the town if an opportunity to break the siege occurred.
[28] The besieging army included troops raised in the Welsh Marches and the Midlands, as well as levies from the north which had already mustered on account of the earlier Scottish raids.
By the end of the month, this force had been augmented by noble retinues, a muster at Newcastle, and the assembly of the English fleet in the River Tyne.
[33] By the end of June attacks by land and sea had brought Berwick to a state of ruin and the garrison close to exhaustion.
[27][35][note 3] It is believed that a desire for a respite from the plunging fire of the two large counterweight trebuchets used by the English was a significant factor in causing the town's governor, Sir Alexander Seton, to request a short truce from Edward.
[37][38] Douglas was now faced with a choice of abandoning Berwick to fall to the English or attempting to go to its relief and risking a pitched battle.
[27] The modern historian Ranald Nicholson considers "If Berwick were to be saved immediate action on the part of the Scottish guardian was unavoidable".
A gallows was constructed in sight of the town walls and, as the highest-ranking hostage, Thomas Seton was hanged while his parents watched.
The town was to be returned to English soil and law but the inhabitants were to be allowed to leave, with their goods and chattels, under a safe conduct from Edward.
[44] Edward ignored the threat to Bamburgh[40][45] as the Scots did not have the time to construct the kind of equipment that would be necessary to take the fortress by assault.
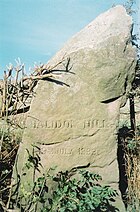
[27] He positioned the English army on Halidon Hill, a small rise of some 600 feet (180 metres), 2 miles (3.2 km) to the north-west of Berwick, which gives an excellent view of the town and the vicinity.
From this vantage point, he dominated the crossing of the Tweed specified in the indentures and would have been able to attack the flank of any force of men-at-arms attempting to enter Berwick.
[43] Crossing the Tweed to the west of the English position, the Scottish army reached the town of Duns, 15 miles (24 km) from Berwick, on 18 July.
They expected the English to come to them, but instead Edward deployed his army as infantry, with his men-at-arms and spearmen in three divisions, which were known as "battles", arrayed in an arc.
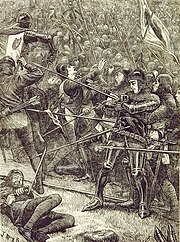
Robert Benhale of Norfolk fought a Scottish champion named Turnbull and his large dog between the armies and killed both.
[52][53] One contemporary account claims the Scots were waiting for high tide on the Tweed, to minimise the possibility of English escapees after a Scottish victory.
[51][56] To engage the English, the Scots had to advance downhill, cross a large area of marshy ground and then climb the northern slope of Halidon Hill.
[60] With two of the three Scottish schiltrons fleeing, the English men-at-arms from Balliol's and Edward's division mounted their horses, which had been held to the rear, and pursued.
They proceeded north and held a parliament at the Scottish capital, Perth, in October 1333, where Balliol restored lands to the "disinherited" nobles who had helped him to the throne the previous year.
In 1337 the Hundred Years' War broke out with France and English efforts were concentrated on this front, allowing the young King David to consolidate his position in Scotland.
[74][76] In 1346 Edward led an English army across northern France, winning the Battle of Crécy and besieging Calais.