Battle of Tarakan (1945)
Four piers used to dock oil tankers were located on this coastline at the settlement of Lingkas, and were connected to Tarakan Town by three surfaced roads.
[2] Prior to World War II, Tarakan formed part of the Netherlands East Indies (NEI) and was an important oil production centre.
Approximately 300 Javanese women also travelled to Tarakan after receiving false offers of clerical and clothes-making jobs from the Japanese and were forced to work as prostitutes.
[8] The Allies also laid mines near Tarakan, which, combined with patrols by air and naval units, prevented Japanese merchant vessels and transports from docking at the island.
[9] The primary objective for the Allied attack on Tarakan (code-named "Oboe One") was to secure and develop the island's airstrip so that it could be used to provide air cover for subsequent landings in Brunei, Labuan and Balikpapan.
The planners did, however, correctly anticipate that the Japanese would make their main stand in an area other than the invasion beach and would not be capable of mounting a large counterattack.
Members of the party eventually landed within the Allied beachhead on Tarakan on 3 May to report to the 26th Brigade, but Whitehead was disappointed with the results of this operation and made no further use of the SRD during the battle.
[20] In line with what had become the standard Japanese defensive doctrine by this stage of the war, Tarakan's coastal areas were considered impossible to defend for a prolonged period.
The naval force was drawn from the United States Seventh Fleet and included several Royal Australian Navy warships and transports.
Other elements of the 2nd Naval Garrison Force included a ground defence company as well as small engineer, medical and supply units.
Four company-sized forces were deployed separately in positions that had been sited to protect the probable landing beaches at Lingkas and the island's south-east coast.
[35] Due to a shortage of shipping all units were ordered to leave non-essential vehicles at Morotai when they began to embark onto assault transports on 20 April.
[38] Due to the need to clear both the large number of naval mines which had been laid around Tarakan and the extensive beach obstacles at Lingkas, the Allies did not attempt a surprise landing.
A group of United States Navy minesweepers and destroyers arrived off Tarakan on 27 April and began clearing mines, most of which had been originally laid by Allied aircraft.
[40] On 30 April, the 2/4th Commando Squadron and the 57th Battery of the 2/7th Field Regiment were landed on the nearby Sadau Island in order to support the engineers tasked with clearing the obstacles off the invasion beaches.
The 2/23rd Battalion disembarked from American LVTs into deep mud at "Green Beach" on the southern flank of the beachhead, and overcame several small Japanese positions in the hills around Lingkas.
The battalion pushed north along the "Anzac Highway" and nearby hills, and rapidly secured a number of pillboxes behind the beach as well as the oil storage tanks.
[45] The light Japanese resistance was attributed to the heavy pre-landing bombardment forcing Tarakan's defenders to abandon the formidable defences at Lingkas.
The small amount of solid ground within the beachhead lead to severe congestion and resulted in none of 2/7th Field Regiment's guns being brought into action until the afternoon of the landing.
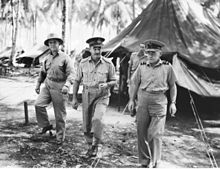
During a meeting with Whitehead, Blamey directed that the 26th Brigade Group should "proceed in a deliberate manner" in clearing the rest of the island now that the main objectives of the invasion had been completed.
[55] In order to secure the island and protect the airstrip from attack, the 26th Brigade Group was forced to clear the Japanese from Tarakan's heavily forested hills.
[56] While attacking these positions necessarily entailed costly infantry fighting, the Australian troops made heavy use of their available artillery and air support to minimise casualties.
[57] The Australian tanks could only provide limited support to the infantry as Tarakan's thick jungle, swamps and steep hills often confined their movement to tracks and roads.
During the fighting at 'Helen' B-24 Liberator heavy bombers were used for close air support for the first time, with P-38 Lightning fighters dropping napalm immediately after the bombing.
The PT boats carried Netherlands Indies Civil Administration interpreters on most patrols who interrogated local residents to gather information on Japanese movements.
[63] The Japanese garrison was gradually destroyed, with the survivors abandoning their remaining positions in the hills and withdrawing to the north of the island on 14 June.
On this day 112 Chinese and Indonesian labourers left the Japanese-held area with a note from a senior Japanese officer asking that they be well treated.
[71] Following the end of organised resistance the surviving Japanese on Tarakan split into small parties which headed to the north and east of the island.
[80] Debate continues over whether the campaign was a meaningless "sideshow", or whether it was justified in the context of the planned operations to both invade Japan and liberate the rest of the Netherlands East Indies, which were both scheduled to begin in 1946.
The Australian official historian Gavin Long's judgement that "the results achieved did not justify the cost of the Tarakan operation"[72] is in accordance with the generally held view on the battle.