Battle of the Hongorai River
Following the end of the early fighting, the Australian advance towards the main Japanese concentration at Buin continued as they struck out towards the Hari and Mivo Rivers.
This continued until torrential rain and flooding brought the advance to a halt short of the objective, washing away many bridges and roads upon which the Australians relied for supplies.
[5] US Marines conducted an amphibious landing at Cape Torokina, on the western coast of the island, north of Empress Augusta Bay, in November 1943.
After an initial counter-attack, the US Marines had been replaced by a garrison of US Army troops who began consolidating their position around Torokina, establishing a strong perimeter.
In late March and early April 1945, they had fought the Battle of Slater's Knoll after which a brief lull followed as the Australians paused to shorten their supply lines.
The Australian 3rd Division was then ordered to resume its advance south, being tasked with capturing the Hari River, while the Hongorai was also included as an "intermediate objective".
[20] The division's infantry had suffered heavily in the previous battle around Slater's Knoll[Note 4] and as a consequence, several units had to be reorganized or amalgamated.
Two days later, Hammer received the order to commence the advance towards the Hongorai from Savige, who offered him the support of the 29th Brigade as a mobile reserve in case of sudden counter-attack.
[12] In a change to the tactics that the Australians had previously employed prior to the fighting around Slater's Knoll, from early May they advanced on a two-battalion front, instead of one.
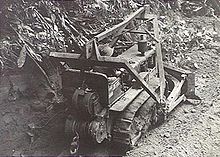
Supported by a troop of Matilda tanks from the 2/4th Armoured Regiment, an artillery barrage which fired over 700 shells, two infantry companies—'C' and 'D'—from the 24th attacked the position while another—'A' Company—carried out a flanking manoeuvre to cut another track further north towards Kindara and Hatai.
In support of 'A' Company, Matildas came forward and raked the jungle, hacking through the undergrowth to reveal several Japanese pillboxes, which were destroyed by the Australian armour.
[28] During this time, the Australians sent a number of patrols out in front of their forward elements, one of which managed to slip through the Japanese defensive positions either side of the Buin Road and carried out a reconnaissance of the Hongorai River about 1,000 yd (910 m) south of the main crossing.
With such strong support the Japanese offered little resistance and over the course of two days the 24th Infantry Battalion covered almost a third of the distance to the Hongorai, for just one man wounded.
To negate the effectiveness of the Australian tanks, the Japanese began to position themselves off the roads, forcing the infantry to fight without their armoured support.
Moving around the stricken tank, the second Matilda, armed with a howitzer, opened fire and destroyed the field gun before sweeping the Japanese defenders from the position.
As they waited for the advance to resume, the Australians carried out reconnaissance patrols deep into Japanese held territory and there were a couple of significant engagements during this time.
[39] Two days later, on 17 May, the 57th/60th Infantry Battalion began its diversionary move on the left flank, crossing the Hongorai inland and advancing along the Commando Road with 32 Corsairs and two batteries of artillery in support.
[41] Advancing under a creeping barrage, and with mortar and machine gun support, the 24th Infantry Battalion moved forward with three companies up front and one held back in reserve, along with two troops of Matilda tanks.
[41] Finally, a company from the 24th Infantry Battalion was able to move on to the high ground on Egan's Ridge, which they found to be heavily mined and booby trapped.
[43] The following day, the battalion left the line of departure and began to advance on its primary objective, which it reached in the early afternoon despite being held up while the tanks attempted to affect a creek crossing, and further delayed by stiff resistance.
[43] By 22 May, although there were still a number of Japanese in the area which continued to harass and ambush their line of communications, most of the Australian objectives had been secured and mopping up operations began.
[44][45] Within a short period of time the Buin Road was subsequently opened, providing the Australians with the means with which to bring up supplies for the next stage of the campaign, being the advance to the Hari, Mobiai, and Mivo Rivers.
[52] The Buin Road was reduced, in the words of Gavin Long, "to a sea of mud"[53] and many of the bridges upon which the Australian supply system was dependent were washed away.
On 9 July, the 15th Infantry Battalion fought off a series of attacks around Siskatekori, at the junction of the Mivo River and the Buin Road, which included a heavy Japanese artillery bombardment.
[57] By mid-August, however, following the dropping of two atomic bombs on Hiroshima and Nagasaki and Japan's subsequent unconditional surrender, a cease fire was ordered on the island and although there were minor clashes following this, it spelt an end to major combat operations.