Battle of Kota Bharu
453 Squadron RAAF[7]New Zealand: 1941 1942 Second Sino-Japanese War The Battle of Kota Bharu began just after midnight on 8 December 1941 (local time) before the attack on Pearl Harbor.
It was the first major battle of the Pacific War,[11] and was fought between ground forces of the British Indian Army and the Empire of Japan.
Japanese losses were significant because of sporadic Australian air attacks,[12] Indian coastal defences, and artillery fire.
The British plan for the defence of the east coast of Malaya consisted of fixed beach defences by the Indian 9th Infantry Division along the northern stretch of coastline and two-thirds of the Australian 8th Division defending the southern stretch of coastline (the other third was deployed to Ambon,[14] West Timor,[15] and Rabaul[16]) The Japanese attack force was drawn from Lieutenant General Tomoyuki Yamashita's 25th Army.
Additional ships carrying more troops joined the convoy from Saigon in southern Vietnam, French Indochina.
Admiral Sir Thomas Phillips, the British naval commander, Far East ordered the battlecruiser HMS Repulse to cancel its trip to Darwin, Australia, and return to Singapore as quickly as possible.
205 Squadron RAF, but the Catalina was shot down by five Nakajima Ki-27 fighters before it could radio its report to air headquarters in Singapore.
[18] Flying Officer Patrick Bedell, commanding the Catalina, and his seven crew members became the first Allied casualties in the war with Japan.
[17] Prior to the invasion the Japanese had recruited a small number of disaffected Malays into a fifth column organization called the "Tortoise Society".
They were escorted by a fleet (Kota Bharu Invasion Force) under the command of Rear-Admiral Shintaro Hashimoto, consisting of the light cruiser Sendai, destroyers Ayanami, Isonami, Shikinami, and Uranami, minesweepers No.
The beaches were split by two estuaries that led to the mouth of the Pengkalan Chepa River through a maze of creeks, lagoons and swampy islands, behind which was the Kota Bharu airfield and the main road inland.
[24]The first and second waves of Japanese soldiers were pinned down by the intense fire from the Dogra's pillboxes and trenches but after vicious hand-to-hand fighting a breach was made in the defences on the south bank of the estuary.
Allied aircraft from the nearby airfields began attacking the invasion fleet and the soldiers trapped on the island.
[25][page needed] The Japanese managed to get off the beach only after the two pill box positions and supporting trenches were destroyed.
[23] The airfield at Kota Bharu had been evacuated and by dusk on 8 December, with very low visibility, and Japanese troops were now able to infiltrate between the British units and with possible threats of landings further south, Brigadier Key asked for permission from Major-General Barstow (9th Division commander) and Lieutenant General Heath (III Corps commander) to withdraw if it became necessary.
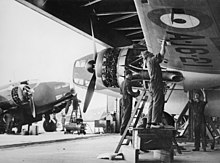
1 Squadron RAAF based at RAF Kota Bharu launched 10 Lockheed Hudson bombers to attack the Japanese transports, each loaded with four 250 lb (113 kg) bombs.
One Hudson, flown by Flight Lieutenant John Graham Leighton Jones, crashed into a fully laden landing craft after being hit while strafing the beachhead, killing some 60 Japanese soldiers on board.