Battle of Bita Paka
Germany See also: Hindu–German Conspiracy The Battle of Bita Paka (11 September 1914) was fought south of Kabakaul, on the island of New Britain, and was a part of the invasion and subsequent occupation of German New Guinea by the Australian Naval and Military Expeditionary Force (AN&MEF) shortly after the outbreak of the First World War.
After a day of fighting during which both sides suffered casualties, Australian forces captured the wireless station at Bita Paka.
The battle was Australia's first major military engagement of the war and the only significant action of the campaign; in its aftermath the remaining German forces on New Britain fled inland to Toma.
[3] On 17 May 1885, the German Emperor granted an Imperial charter to the newly founded Neuguinea-Kompanie (New Guinea Company) for this annexation, which was further extended to the Solomon Islands on 13 November 1886.
[6] It remained a modest outpost, and by August 1914 only 1,273 Europeans lived in the colony, while there was also a small but significant number of Japanese, Chinese and Malays.
"[8] Within days, Brigadier General William Bridges and his staff officer, Major Cyril Brudenell White, had completed plans for the creation of the Australian Imperial Force (AIF).
[9] Meanwhile, after an additional British request for assistance on 6 August 1914, the Australian government hurriedly prepared another expeditionary force to destroy the German wireless stations at Yap in the Caroline Islands, Nauru, and Rabaul in New Britain.
Landing parties went ashore to demolish the telephones in the post offices in Rabaul and at the German gubernatorial capital of Herbertshöhe (present-day Kokopo), located 20 miles (32 km) to the south-east.
Wuchert's force was assigned to defend against any hostile landing at a point near the coast, and was authorised to withdraw halfway between Toma and Bita Paka to Tobera if necessary, but only after demolishing the radio station.
Despite the limits of manpower, such arrangements proved effective and the reconnaissance of the Australian Squadron on 12 August had been quickly detected, with German forces subsequently directed towards the coast to repel any invasion.
They suddenly surprised a group of about 20 Melanesian soldiers led by three German reservists, who were apparently laying an ambush on the road for the advancing Australians.
By means of a ruse Wuchert and Mayer were also captured, depriving the defenders of two important commanders, while several significant maps also fell into Australian hands at this time.
[30] During the advance the Australians had also uncovered and defused a large pipe mine the Germans had buried under a narrow track and set to detonate using a command wire.
These mines had been laid beneath the road with wires leading to an electric battery and a firing key at the bottom of a lookout tree.
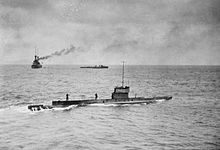
[33][34] While the casualties suffered by the Australians were light in the context of later operations, they were disproportionately heavy given the modest territorial and strategic gains and were further compounded by the disappearance of the submarine AE1 during a patrol off Rabaul on 14 September, with all 35 men aboard.
[35] After their defeat, the remaining German forces and the civil administration withdrew 19 miles (31 km) inland to Toma, believing they would have time to regroup before the Australians arrived.
[36] Unknown to the Germans, however, an Australian advanced party consisting of a half-battalion of 200 men and a 12-pounder naval field-gun had followed them, moving along the Toma road.
The Australians surrounded the town and proceeded to bombard it; meanwhile HMAS Encounter arrived on station and fired several shells at a ridge nearby.
All military resistance subsequently ceased and the remaining 40 German soldiers and 110 Melanesians surrendered on 21 September, leaving no effective opposition to the Australian occupation of the territory.
After rounding Cape Horn into the Atlantic and attempting a raid on the Stanley naval station, the squadron was itself destroyed by a more powerful British force during the Battle of the Falkland Islands on 8 December 1914.
[43][Note 3] Following the capture of the remaining German possessions in the region, the AN&MEF provided occupation forces for the duration of the war.
[46] The Australian military administration continued the exploitative economic policies of the previous German colonial administration, and official policy was to continue the status quo, including the use of indentured Melanesian labour on plantations, the levy of the "native head tax" and official floggings, or corporal punishment.
[47][Note 4] Equally, despite previously being protected by the German colonial administration in 1914, the hunting of the native bird-of-paradise, crowned pigeon and white heron for the lucrative trade in their feathers and skin, was officially condoned and a custom tax levied on their export.
[49][Note 6] On 9 January 1915,[50] Holmes handed over command of the AN&MEF to Brigadier General Sir Samuel Pethebridge, the former Secretary of the Department of Defence.
[52] Although required by international law to follow the German forms of government, the territory gradually acquired the appearance of a British colony.
[54] Ultimately, the Australian operation on New Britain achieved its objectives, with the AN&MEF destroying the wireless station before seizing the colony, reducing a strategic German possession in the Pacific and thereby denying its use to support their naval forces in the region.
[54] The Battle of Bita Paka was Australia's first major military engagement of the war, but it soon became little more than a sideshow in a conflict which grew to assume much greater proportions.