Middlesex Yeomanry
[5][6][7][8][9] After the Treaty of Amiens was concluded in 1802 the regiment was disbanded[5] following a spate of industrial unrest and rioting, authorisation was given on 10 December 1830 to raise two new troops of Yeomanry in the Uxbridge district.
The regiment was called upon to provide an escort for King William IV as he passed through Uxbridge to visit the Marquess of Westminster at Moor Park in 1834.
The Middlesex Yeomanry were assigned as 'divisional troops' to 3rd Division of II Corps based at Dorking, alongside Regular units of infantry, artillery and engineers.
Existing yeomen and fresh volunteers (mainly middle and upper class) quickly filled the new force, which was equipped to operate as Mounted infantry.
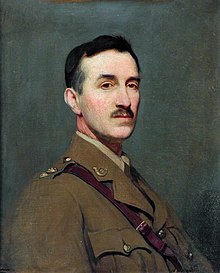
On 25 May Maj Henry Dalbiac (a former Royal Artillery officer and veteran of Tel el Kebir) with 34th (Middlesex) Company, acting as advance guard, entered the empty town of Senekal.
11th Battalion IY was the main part of a covering force of 400 yeomanry and two guns camped on the nearby hill of Groenkop under the command of Maj Williams.
On occasions mounted parties of the Middlesex Yeomanry, riding with muffled bits, were sent out at night into No man's land (here about 1 mile (1.6 km) wide) to erect barbed wire obstacles.
The Turkish Yildirim Army Group carried out a reconnaissance in force in late October against 8th Mounted Brigade, which was holding a 14 miles (23 km) outpost line along the el Buqqar ridge to cover railway construction parties.
At 04:10 on 27 October a post on Point 630 held by the Middlesex Yeomanry was attacked by an Ottoman cavalry patrol in great strength, bringing on the Battle of Buqqar Ridge.
A squadron of the City of London Yeomanry in reserve advanced, also under heavy fire, to occupy a position 200 yards (180 m) south of the threatened post, which stopped the Ottoman forces from completely surrounding the Middlesex men.
The Yeomanry were initially held in reserve, but on 6 November the division went into action as part of the Desert Mounted Corps (DMC) at the Capture of the Sheria Position.
It paused to water the horses in the evening, then moved off again an hour before midnight, riding into the German–Turkish HQ at Afulah and then heading east to Beisan to cut off Turkish retreat.
It encountered the HQ elements of the German Asia Corps at Makhadet abu Naji; after a fight the cavalry charged to seal off both sides of the ford, capturing 4000 prisoners.
The men were beginning to suffer from malaria, influenza and hunger, and the advance slowed, but on 30 September 11th Brigade was pushed on ahead and caught up with Col T. E. Lawrence and the Arab irregulars attacking the Turkish rearguard.
It moved out from Transjordan following the Amman–Baghdad road and Mosul–Haifa oil pipeline to the fort of Rutba, which had been recaptured by the Arab Legion and 2nd RAF Armoured Car Squadron on 10 May.
Kingcol moved out from Rutba on 15 May, crossing the desert in exceptionally hot weather, digging the heavy vehicles out when they broke through the surface of the poor tracks, and under attack by German aircraft.
Its role was to advance across the desert from Iraq and capture Palmyra, while a direct attack (Operation Exporter) was made from Palestine towards Damascus by a force including part of 1st Cavalry Division.
[7][8][11][71][72] 10th Armoured Division remained in Palestine until the end of April 1942 when part of it moved up to Libya and was engaged in the confused Second Battle of Ruweisat Ridge (El Mreir) (21–22 July).
It was then sent up to join 'Calforce' under the command of Brig Percy Calvert-Jones of 12th Anti-Aircraft Brigade who had gathered a heterogeneous collection of artillery units in a series of rearguard actions during Eighth Army's long retreat to the El Alamein position.
It left its rest area near El Alamein station by 20.00 on 1 November and made a difficult approach march through darkness and dust, and its delayed attack began just before dawn.
[69][76][77] After Alamein 9th Armoured Bde was sent off with 2nd New Zealand Division to pursue the beaten Axis forces, though it was badly held up by road congestion and only managed 12 miles (19 km) on the first day (4 November).
[83][84][85][86] However, even at the time of greatest invasion threat, the British Government was prepared to send armoured units to reinforce Middle East Forces facing the Italians.
On 31 March 2nd Armoured Division under the command of Maj-Gen Michael Gambier-Parry was holding the front when Gen Erwin Rommel opened the Axis counter-offensive (Operation Sonnenblume) and began pushing it back.
The brigade served through the rest of the Western Desert Campaign under the command alternately of 1st and 7th Armoured Divisions, seeing action at the Relief of Tobruk in November 1941, and the battles of Gazala, Mersa Matruh, First Alamein and Alam el Halfa.
[92] 22nd Armoured Brigade was re-equipped and trained in the area round Brandon, Suffolk, to take part in the Allied landings in Normandy (Operation Overlord).
At first progress was slow, but on 29 March 22nd Armoured Bde fanned out leading the advance; the division made 120 miles (190 km) by 2 April, only halted by the River Ems.
[111] The full dress uniform of the unit raised in 1830 comprised a green coatee with black facings and turnbacks, brass shoulder scales for other ranks, epaulettes for officers, and gilt buttons inscribed 'U.Y.C.'
The headdress was a wide-topped light dragoon shako with black plume and cap-line and a brass Maltese cross with the Coat of arms of Middlesex in the centre.
[11][19][115][116] The khaki service dress of the regular cavalry was adopted for training and ordinary duties about 1907, becoming the standard uniform worn on all occasions following the outbreak of the First World War.
On 28 March 1918 he was commanding the battalion as an acting Lt-Col when he won a posthumous VC leading a counter-attack at Rossignol Wood north of Hebuterne, France.