Zungwini Mountain skirmishes
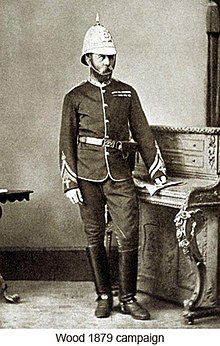
The mountain lay near the proposed route of advance of a British column under Lieutenant-Colonel Evelyn Wood, one of three that marched on the Zulu capital, Ulundi, from early January.
Aware that the other columns had made less progress Wood, who had halted to fortify a camp at Tinta's Kraal, decided to deal with the abaQulusi strongholds.
On 20 January a force of 104 irregular horse under Wood's subordinate, Lieutenant-Colonel Redvers Buller, carried out a reconnaissance of Zungwini Mountain.
The action of 20 January led Wood to order a stronger attack on the mountain, with a force under his command with regular infantry and artillery.
By this point Wood had received news of the defeat of the British centre column at the 22 January Battle of Isandlwana, which exposed his right flank to the main Zulu army.
Wood ordered a withdrawal back to Tinta's Kraal and then to Kambula, from which he sent several raids against the abaQulusi before joining the second invasion of Zululand in June, which resulted in British victory in the war.
[6] Wood considered the presence of the abaQulusi, who maintained strongholds on the flat-topped mountains of Zungwini, Hlobane and Ityenka, a threat to his supply lines and left flank and thought their defiance intimidated chiefs who might otherwise have surrendered to the British without bloodshed.
[1][3][7][8] Mbilini, who took control of the abaQulusi forces and those of the Kubheka from the Ntombe valley, pursued a defensive strategy, influenced by that of the Swazi people.
[2][9] By this time Buller's irregular horse, scouting ahead of the column, had captured 600 Zulu cattle but found no significant opposition.
A force under Buller ascended the slope by a cattle track to gain a view of the surrounding area but the Zulu moved to prevent his ascent.
[1][8] Buller ordered a withdrawal down the mountain, during which a man of the Frontier Light Horse was wounded and two others struck by spent musket balls.
Wood had recently sent 70 empty ox-drawn wagon back to Balte Spruit and was concerned for their safety, as Buller's note had been sent before he had seen off his pursuers.
[13][16] Wood judged it too late in the day to launch an attack and he ordered his men to descend the mountain to bivouac with Gilbert's force.
[9][12] After dark the men heard cannon fire from the direction of the centre column's camp at Isandlwana which Wood thought indicated an "unfavourable situation".
[13][9] In the early morning of the following day Wood advanced with a strong force that included the four of the 7-pounder artillery pieces under Brevet Lieutenant-Colonel E. G.
[1][17][15] The force had advanced 8 miles (13 km) by 7.30 am reaching a point between the Zungwini and Ntendeka mountains when they encountered a party of abaQulusi Zulus running towards them.
Gardner had escaped to Helpmekaar, Natal, but realised that Wood, whose force was just 35 miles (56 km) from Isandlwana, was vulnerable to attack by the victorious Zulu.
[1][2][15] Wood and Buller's victories at Zungwini had undermined local support for the abaQulusi and the war against the British; the eclipse of 22 January had also been held by the Zulu as a portent of the decline in Mbilini's power.
Expecting an attack on his post Wood later recalled not sleeping for more than 2–3 hours at a time over the next three months, as he insisted on checking on the sentries personally.
[21] On 1 February Wood razed an abaQulusi stronghold east of Hlobane, killing six Zulu, burning 250 huts and taking 270 cattle.
[4] Wood lead a raid on Hlobane on 28 March that resulted in defeat as the British were cut off on the mountain top by the abaQulusi and elements of Cetshwayo's army.
Following a steady and careful advance into Zululand the Zulu were defeated at the 4 July Battle of Ulundi and the war brought to a close.