Battle of Hareira and Sheria
British Empire Egyptian Expeditionary Force Yildirim Army Group The Battle of Hareira and Sheria was fought on 6–7 November 1917 when the Egyptian Expeditionary Force attacked and captured the Yildirim Army Group's defensive systems protecting Hareira and Sheria [he] in the centre of the Gaza to Beersheba line, during the Southern Palestine Offensive of the Sinai and Palestine Campaign in World War I.
These defensive systems, which had successfully repelled frontal attacks during the Second Battle of Gaza, became vulnerable, after a six months' stalemate, to a flanking manoeuvre by the XX Corps on 6 November.
The Ottoman Army's main Desert Base at Hafir el Aujah was being reduced as a result of the victory at the Battle of Rafa in January 1917 which ended the Sinai campaign.
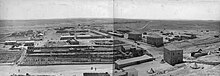
[7] Here the Fourth Army established a central training facility staffed with German and Austrian instructors as well as experienced Ottoman officers from the European fronts of Galicia, Romania, and Macedonia.
[22] Although this fierce fighting for control of the high country north of Beersheba resulted in a drawn battle, Desert Mounted Corps was able to advance to gain a "position of vantage from which to roll up the enemy's flank.
[31][Note 4] Any EEF infantry or mounted attack on Sheria or attempted breakthrough northwards would be stopped by enfilade fire from a string of mutually supporting smaller works east of the railway line from Beersheba, 5–6 miles (8–9.7 km) south-east of Hareira.
[11] The Seventh and Eighth Armies' reserve force known as the Zuheilika Group, commanded by Colonel Ali Fuad, was formed by withdrawing part of the Ottoman 26th Division at Khirbet Sihan and at the Hareria defences, during the night of 4/5 November.
Chetwode telegraphed him at 10:15 to say, 'General Chauvel and myself, after closest consultation, have decided with great reluctance that, owing to water difficulties and thirst of men, postponement till 6th November is inevitable.'"
[42] Further the troops concentrating for the attacks on Hareira and Sheria, which were deployed in a barren desert area "quite unsuitable for mounted work", required an additional day's supply for each man, and sufficient for every animal to have "drunk its fill", before this force could march out to battle.
The 16th Battalion Sussex Regiment attacked, supported by one Lewis gun and two rifle sections, when they captured three officers, 25 men and a battery, which had been firing on troops of the 229th Brigade.
"[93] Having previously found a gap in the defences, D Company, 2/20th Battalion, London Regiment (180th Brigade) pressed on without protection on either flank, capturing some prisoners and two machine guns before establishing themselves on a small hill some 500 yards (460 m) south-east of Sheria station.
Caught in the open the attacking force held their ground, establishing outposts and sending out patrols to find crossings of the Wadi esh Sheria, but these "met with heavy machine-gun fire.
"[82] The "glare of the flames so exposed the line of advance across the wadi,"[89] making the attacking infantry "ideal targets" for the well-hidden Ottoman machine guns of the garrison on the hill.
After watering, the 2nd Light Horse Brigade moved out again "in great haste" to the Anzac Mounted Division's assembly point 5 miles (8 km) south-east of Sheria.
[97][106][107] As soon as Allenby heard during the evening of 6 November, that the Qawuqa trench system defending Hareira had been captured, he anticipated the Wadi esh Sheria being crossed that night and issued orders for Chauvel, to ride through the broken centre of the Ottoman line to Jemmame and Huj.
Following on the right flank the 6th Battalion Royal Inniskilling Fusiliers, with four machine guns advanced towards the separate entrenchments to the north-east of the redoubt, defending Khan Abu Jerra.
[Note 12] When this became clear, most of the garrison evacuated the Hareira redoubt, before the Irish Fusiliers assaulted the position with machine guns, trench mortars and overwhelming numbers.
[128][129][Note 14] Although the attack by the 60th (London) Division was to be resumed at 03:30, to allow time for the incessant explosions of the Sheria ammunition dump, which continued until 02:30, to diminish, and although the leading battalions had begun moving forward at 03:30, a further postponement until 05:30 about an hour before sunrise, was necessary.
[131] In the dim early morning light, the Ottoman defenders swept the bed of the wadi with machine gun and rifle fire from Tel esh Sheria, before facing the Londoner's attacks at close quarter, with bombs (probably grenades) and bayonets.
[139][141] The strong Ottoman position on the ridge dominated a long bare slope without any cover, from where they fired their machine guns and heavy artillery, at the Londoners during the afternoon.
[133] Just before dusk, Chauvel ordered the 179th Brigade, which had not taken part in the earlier fighting, to capture the strong Ottoman rearguard, which had stopped the combined light horse and infantry attacks.
At 07:00 D Squadron was detached to the 60th (London) Division while the remainder moved behind the Royal Gloucestershire Hussars and Warwickshire Yeomanry to reach the north bank of the Wadi Sheria at 16:00.
[146] A few days after Beersheba was captured the Ottoman line was broken by the infantry at Sheria, and between Gaza and the sea making possible the, "[u]p til then ... grandest cavalry drive of the war.
[149][150] The result of the fighting on 6 November caused the Ottoman defenders to reinforce Tel esh Sheria and Khuweilfe, so that a gap opened between the two positions, covered for the first couple of miles on the left by the 60th (London) Division.
[152][154] Chauvel was informed at 11:00 that the Anzac Mounted Division had captured Ameidat Station,[155] having passed through a gap in the Ottoman defences, which they found less than 2 miles (3.2 km) from Sheria.
"[156] News of the fall of Gaza arrived at 12:30, and in the afternoon patrols of one squadron each, were sent by the Anzac Mounted Division towards Tel en Nejile 4 miles (6.4 km) to the north on the railway, and towards Kh.
Although the rearguard was attacked by the 2nd Light Horse Brigade, they continued to hold their position until after dark,[157] when they retreated in good order, covering their infantry, artillery and supply convoys while steadily fighting the EEF, with well-placed machine guns.
[143] Soon after it had been established that Gaza had been evacuated, the Imperial Service Cavalry Brigade advanced north through the ruined city on 7 November, to capture a ridge overlooking Beit Hanun but without reinforcements, they were forced to withdraw to water.
"[90] However, the Yildirim Army Group had gained most of 7 November to conduct an orderly retreat north, after destroying the stores in Tel el Sheria and Deir Sneid dumps and depots.
[163][166] The Desert Mounted Corps' first objective on 8 November was the capture of the water at Nejile, and Huj on their way towards the Mediterranean coast, where they hoped to cut the Ottoman line of retreat from Gaza.