Battle of Jerusalem
[12] Allenby was aware of the lack of accurate maps of the Judean Hills and that the history of previous campaigns in the region gave clear warnings against hasty or lightly supported assaults on the strong western ramparts.
This city was captured as a result of the victory at Ayun Kara two days earlier, which forced the Ottoman Eighth Army to withdraw over the Nahr el Auja, which enters the sea 4 mi (6.4 km) north-north-east of Jaffa.
[30] On 18 November, while Allenby was at the British XXI Corps headquarters at El Kastine, the decision was made to closely follow the Ottoman Seventh Army into the Judean Hills.
The brigade's 9th Light Horse Regiment carried out a turning movement up the Wadi es Selman north of Amwas to reach the village of Yalo 2 mi (3.2 km) to the east.
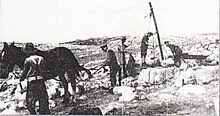
[11] The rough tracks meandered through narrow valleys and over distorted piles of razor-backed ridges, which were broken by groups of cone-shaped hills and successive shelves of rock jutting out from every hillside at intervals of a few yards.
[39] All military activities were made even more difficult by the winter conditions; the ground was slippery and dense black clouds brought early darkness which cut visibility.
[41] In these conditions the Ottoman forces encountered on the road were the rearguards von Falkenhayn had ordered XX Corps to establish as it retired back to defend Jerusalem.
[37] In addition to the Nahr Sukrerir line stretching to Bayt Jibrin together with Summeil and El Tineh (where the Battle of Mughar Ridge was fought), the positions of the EEF and the Ottoman armies on the evening of 19 November 1917 are shown on this sketch map.
[48] At 11:30 on 21 November the leading regiment, the Dorset Yeomanry descended from the hills on which Beit Ur el Foqa stands and found Ottoman units holding the western rim of the Zeitun Ridge above them.
[59] In order to move such large formations a pause was unavoidable and so the attack was discontinued, but von Falkenhayn and his Ottoman Army took notice of the temporary cessation of hostilities.
After successful actions by the New Zealand Mounted Brigade, two infantry battalions of the 54th (East Anglian) Division held these two bridgeheads on the northern bank until they were attacked by overwhelming forces on 25 November.
As their horses had been sent back down the river to the ford on the beach, the squadrons of the New Zealand Mounted Rifles Brigade moved to reinforce the Khurbet Hadrah position, but arrived just as the withdrawal was taking place.
They were supported by the Somerset battery, which continued firing from a position 1,400 yd (1.3 km) south, on the southern side of the river, until after the Ottoman Army had reoccupied the village.
Subsequently, he commanded the defences at Magdhaba in December 1916, at Rafa in January 1917, at Gaza and Beersheba in March, April and October 1917 and during rearguard battles up the maritime plain to Jaffa in November 1917.
"[74] Von Falkenhayn and the Ottoman Army sought to benefit from the weakened and depleted state of the worn out British Empire divisions which had been fighting and advancing since the beginning of the month.
The 53rd (Welsh) Division, with the Corps Cavalry Regiment and a heavy battery attached, remained on the Hebron road north of Beersheba, coming under direct orders from General Headquarters (GHQ); they became known as Mott's Detachment.
[54] During the week beginning 27 November the Ottoman Army launched a series of infantry attacks employing shock tactics in the hope of breaking the British lines during the period of destabilisation created by troop reinforcements and withdrawals.
[81][82] After some desperate fighting in close action, pressure eased somewhat and some lost ground was recovered, but the Ottoman force began to outflank the mounted brigade to the west.
[83][84] The 5th Battalion, Norfolk Regiment were driven out of Shilta, but infantry from the 155th (South Scottish) Brigade of the 52nd (Lowland) Division, in the process of being relieved, returned to the front, closed the gap, and pushed the Ottoman soldiers back out of the lines of communication.
[82] Ottoman counterattacks began on 27 November, when the Yeomanry Mounted Division's most advanced post at Zeitun on the western end of the Beitunia Ridge was attacked by a much larger force.
They held off the Ottoman attackers until 28 November, when the division was forced to withdraw from their advanced posts, including Sheik Abu ex Zeitun and Beit Ur el Foqa.
The 11th Light Horse Regiment was pushed forward with two machine guns to hold Wadi Zeit south west of Beit Ur el Foqa.
They managed to break out of the position and joined the support company of the 10th Battalion, King's Shropshire Light Infantry covering Et Tire and facing Signal Hill, which became the focus of the next Ottoman attack.
Combined with the steady fire of the dismounted 3rd Light Horse Brigade, the shower of bombs from the Fusiliers forced the Ottoman soldiers to fall back and dig in.
The Ottoman Army had failed to win any ground as a result of their counterattacks, and the advancing British troops were successfully replacing their tired comrades who were well entrenched close to Jerusalem.
[103] By 7 December Mott's Detachment had found touch with the Ottoman position defending Bethlehem 4 mi (6.4 km) from his objective, but bad weather prevented an advance.
[114] On 11 December, two days after the official surrender and exactly six weeks after the fall of Beersheba, Allenby (commander of the EEF) made his formal entry into Jerusalem on foot through the Jaffa gate instead of by horse or vehicles to show his great respect for the holy place.
The Australian 10th Light Horse Regiment, who had previously occupied Jerusalem on 9 December, provided a mounted guard of honour commanded by Captain Throssell VC.
[128] In order to consolidate a strong British Empire line, it was necessary to push the 3rd and 7th Infantry Divisions of the Ottoman Eighth Army back away from the Nahr el Auja 4 mi (6.4 km) north of Jaffa on the Mediterranean coast.
Allenby's advance by comparison made considerable territorial gains, helped secure Baghdad and the oilfields at Basra in Mesopotamia, encouraged the Arab Revolt, and inflicted irreplaceable losses on the Ottoman Army.