Battle of Mughar Ridge
After the capture of Beersheba on 31 October, from 1 to 7 November, strong Ottoman rearguard units at Tel el Khuweilfe in the southern Judean Hills, at Hareira and Sheria on the maritime plain, and at Gaza close to the Mediterranean coast, held the Egyptian Expeditionary Force in heavy fighting.
By the morning of 8 November, two infantry brigades had crossed the Wadi el Hesi near its mouth and, despite some opposition established themselves on the sand dunes to the north towards Askelon.
[9] The Ottoman rearguards were able to safely get away during the night of the 8/9 November, but during the following day the only infantry unit capable of advancing was the 52nd (Lowland) Division's 156th (Scottish Rifles) Brigade, commanded by Brigadier General Archibald Herbert Leggett.
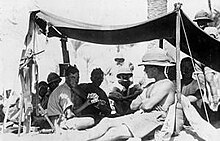
I fancy that Kress von Kressenstein is nearing the Jaffa-Jerusalem line, himself.Chaytor's Anzac Mounted Division moved off across the maritime plain towards the coast soon after daylight on 9 November, having watered their horses the previous evening.
Here Ottoman soldiers were discovered to be occupying a strong position on high ground north-west of the village; the brigade made a dismounted attack capturing 600 prisoners along with large amounts of supplies, materiel and an abandoned German field hospital.
The Anzac Mounted Division took up a night battle outpost line along high ground south of the Wadi Mejma, from near Isdud to Arak Suweidan.
If the Turks can't stop us tomorrow, they are done.Meanwhile, Hodgson's Australian Mounted Division, spent most of 9 November searching for water, which was eventually found at Huj.
[13][18][27] The 52nd (Lowland) Division had ended the possibility of an Ottoman stand on the Wadi Hesi and the next natural defensive line was 7–15 miles (11–24 km) to the north, on the Nahr Sukereir.
The new line stretched about 20 miles (32 km) west to east from the mouth of the Nahr Sukereir on the Mediterranean Sea to Bayt Jibrin not far from Tel el Khuweilfe in the Judean Hills.
[32] The Ottoman Eighth Army on the coastal sector was still retreating when ordered to form the new line along the north side of the valley of the Nahr Sukereir, more than 25 miles (40 km) from Gaza.
[40][41] Both the Australian and Yeomanry Mounted Divisions reconnoitred the left half of the Ottoman line running from Qastina, roughly through Balin and Barqusya, to the neighbourhood of Bayt Jibrin in the foothills of the Judean Hills.
The Anzac Mounted Division were resting at Hamama when their supporting Australian Army Service Corps personnel caught up and distributed supplies for man and horse.
Their Auckland Mounted Rifle Regiment, which had been in the front line with the 53rd (Welsh) Division about Tel el Khuweilfe in the southern Judean Hills not far from Hebron, made a forced march of 62 miles (100 km).
[48][49] The 20 miles (32 km) defensive line, chosen by the Ottoman commanders to rally their 20,000-strong army and stop the invasion, was also designed to protect the Jaffa to Jerusalem railway and the threatened Junction Station.
It ran along a high steep ridge connecting the hillside villages of Al-Maghar and Zernukah (surrounded by cactus hedges) and extended north-westwards to El Kubeibeh.
[54] Erich von Falkenhayn, the overall commander of the Ottoman Armies, had resolved to make a stand in front of Junction Station and succeeded in deploying his forces by the evening of 11 November.
But just 20 minutes after taking Brown Hill the remnants of the Scots battalion (now down to just one officer and about 100 men) was unable to withstand an Ottoman counterattack and was driven off after a fierce struggle at close quarters.
Owing to poor light, the artillery was no longer able to give much assistance, but nevertheless the Gurkhas quickly retook the hill with a bayonet charge, suffering 50 casualties, and in the process recovering two Lewis guns.
[68] Ten minutes later the British Honourable Artillery Company battery opened fire, but was hopelessly out shot, outnumbered, and out ranged by Ottoman guns of greater power and weight.
Two batteries of Australian Mounted Division were in action on the high ground north-west of Summeil firing on this fresh Ottoman force moving over the open plain in full view of the gunners.
Fighting steadily and withdrawing skilfully, the 3rd Light Horse and 5th Mounted Brigades had reached the edge of Summil village where the Ottoman attack was finally held.
A critical situation created by the strong Ottoman attacking forces had been controlled by the coolness and steadiness of the troops, especially the machine-gun squadrons of the 5th Mounted and the 4th Light Horse Brigades.
Its most prominent feature, the 100-foot (30 m) high ridge which continues north towards Zernukah and El Kubeibeh formed the backbone of the Ottoman Army's 20-mile (32 km) long defensive position.
Infantry in the 75th Division made steady slow progress; the main body of the Ottoman rear guard eventually falling back to a slight ridge 1 mile (1.6 km) to the north-east.
With Ottoman resistance broken infantry in the 75th Division pushed on through Mesmiye where they took 300 prisoners, and although ordered to capture Junction Station they halted short of their objective in darkness.
[89][90] At about 11:30 the two leading battalions of the 155th (South Scottish) Brigade (52nd (Lowland) Division) were advancing under heavy shrapnel and machine-gun fire to the shelter of the Wadi Jamus about 600 yards (550 m) from their objective.
[96] On 14 November the New Zealand Mounted Rifles Brigade (commanded by Brigadier General William Meldrum) ran into a determined and well entrenched Ottoman rearguard near Ayun Kara, which they attacked.
[106] About noon the 1st Light Horse Brigade drove an Ottoman rearguard from a ridge facing Yibna where the Anzac Mounted Division had bivouacked the night before and occupied the village of Rehovot also called Deiran.
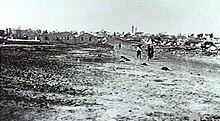
[109] The Ottoman armies suffered heavily and their subsequent withdrawal resulted in the loss of substantial territory; between 40–60 miles (64–97 km) was invaded by the British north of the old Gaza–Beersheba line.
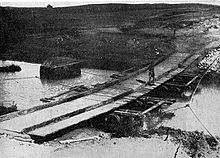
However, from the beginning there were problems evacuating casualties caused by the lack of linking infrastructure, one receiving station lost all its transport, and the light motor ambulances of another disappeared.