Second Battle of Krithia
The village of Krithia and neighbouring hill of Achi Baba had to be captured in order for the British to advance up the Gallipoli peninsula to the forts that controlled passage of the Dardanelles straits.
[3] Similar counter-attacks were repulsed at the Anzac landing on 2 May so that General William Birdwood, commander of the Australian and New Zealand Army Corps deemed his front sufficiently secure to enable two brigades to be moved to Helles for the next assault on Krithia.
[6] While Cape Helles is more forgiving than the wild terrain at Anzac Cove, the battlefield still presented difficulties to the attacking force.
The ground looked flat but was riven by four large gullies, or deres, running from Achi Baba towards the Cape.
The first phase involved a general advance of one mile across the entire front which would place the French, on the right of the line, astride Kereves Spur where they were to dig in.
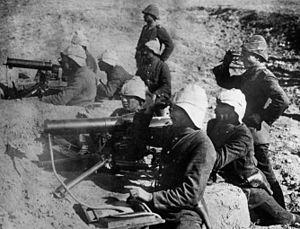
On the morning of 8 May, the 88th Brigade in front of Krithia on Fir Tree Spur was relieved by the New Zealanders who made yet another attempt which failed with huge losses.
The Wellington, Canterbury and Auckland Battalions gained another 400 yd (370 m) through Fir Tree Wood to a place called the 'Daisy Patch' before they became pinned down.
The Australians were to advance along Krithia Spur between the right flank of the New Zealand brigade and the edge of Kanli Dere,[10] and had to travel up to 800 yd (730 m) from their reserve position just to reach the start line at "Tommy's Trench".
The New Zealand brigade made another attempt to cross the Daisy Patch, and some troops managed to actually sight the Ottoman trenches.
On the right, the French resumed their advance at 18:00 and made good progress, reaching the Ottoman trenches on Kereves Dere.
With the failure of the second battle, Hamilton made a request to the British Secretary of State for War, Lord Kitchener, for an additional four divisions.