Battle of Hamel
To give the newly arrived American Expeditionary Force (AEF) combat experience, the five Australian infantry brigades involved were augmented by 10 companies from US Army battalions.
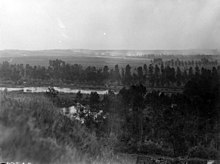
[5] Located south of the River Somme, about 1.9 miles (3 km) north-east of Villers-Bretonneux on a spur between two hills, Hamel was strategically important to both the Allies and Germans.
The village also acted as an obstacle to the proposed eastward advance through the Somme planned for later in the year and its capture would facilitate future offensive operations in the sector.
[12][13] There was advanced co-ordination between infantry, artillery and armour, and the latest, highly manoeuvrable Mark V tank was used after it had been demonstrated to Monash and Rawlinson.
[10] Although the Australians had worked with a small number of tanks successfully at Villers-Bretonneux, their opinion of the technology was clouded by the bad experience they had had of them in April and May 1917 around Bullecourt.
[16] Charles Bean, the official Australian war historian, noted that Monash was more effective the higher he rose within the Army, where he had greater capacity to use his skill for meticulous planning and organisation, and to innovate in the area of technology and tactics.
Bean wrote in his diary of Monash "We do not want Australia represented by men mainly because of their ability, natural and inborn in Jews, to push themselves".
However, he first consulted with senior officers and heard their praise of their commander, and Monash also showed his superb power of planning for the upcoming battle.
[21] Estimating the German strength around Hamel as being around 5,600 (2,790 in the front line, with 2,860 in reserve),[22] Monash chose Major General Ewen Sinclair-Maclagan's Australian 4th Division to provide the bulk of the assaulting force.
[25] On 29 June, Major General George Bell, commanding the American 33rd Division, selected two companies, each of 250 men,[26] from the 131st and 132nd Infantry Regiments of the 65th Brigade.
[36] At 22:30 on the night of 3 July, the British Mark V and Whippet tanks began to move from Fouilloy and Hamelet to their assembly areas half a mile (0.8 km) behind the front lines.
101 Squadron of the British Royal Air Force provided additional cover by dropping three hundred and fifty 25-pound bombs to the east of the Australian front.
Although the barrage was mostly accurate, some rounds fell short at the junction of the 4th and 11th Brigades, virtually wiping out one American squad and one platoon of the 43rd Battalion.
[38] Other fighting occurred on the periphery, with actions being fought as far south as the Roman Road – 4.0 miles (6.5 km) away[43] – and further to the north beyond the River Somme around Ville-sur-Ancre.
Situated south-west of Hamel on the "reverse slope of a gentle spur",[38] the Pear Trench formed the centre of the 4.0 miles (6.5 km) front over which the Australians attacked.
The tanks the 4th Brigade had been assigned had become lost in the darkness and failed to arrive on time; meanwhile, the artillery preparation in this sector had fallen short, and some shells had landed among the 15th Battalion as they had formed up for the assault, causing casualties and leaving part of the German defences unmolested and free to engage the infantry with machine-gun fire with heavy Maxim guns.
[48][38] Occupying a commanding view of the ground to the west, over which the Australian infantry had to assault, the position was reinforced with barbed wire, and anchored with multiple machine-gun posts.
Taking heavy fire from the edge of the wood and the northern part of the Kidney Trench, the battalion's lead company lost its commander and sergeant major, checking their advance.
The company of the 43rd on the edge of the wood was held up briefly by a machine-gun enfilading their line of advance before a tank crushed the position;[13] further north, the 42nd Battalion, after briefly becoming confused, had been moved into position with precision drill,[55] and as the combined weight of air support, artillery and armour was brought to bear the German resistance in the wood melted away.
During this time, small actions continued as a German machine-gun post north of the Pear Trench was silenced by a Lewis gun team and a group of Americans.
[13] The second phase of the attack resumed after a 10-minute pause,[44] as the men of the 43rd Battalion began to clear the remaining German defenders from the village and the nearby quarry.
As the sun began to rise they were no longer inhibited by the darkness and came to dominate the situation,[43] winkling out isolated pockets of resistance in the areas that had already been captured.
[56] As the Germans launched a counter-attack, a request for emergency artillery support was sent via a distress flare, and another platoon was brought up to stem the tide and eventually the 25th secured their objective north of the Roman Road.
[15] The feint was a key part of the Allied deception plan to mask the size of the attack at Hamel and disrupt German efforts to counter-attack or reinforce the village.
9 Squadron RAF, began flying supply sorties, employing parachute drops that had been developed by a team led by Australian Captain Lawrence Wackett.
[68] The Germans continued to harass the Australian troops around Hamel the rest of the day, undertaking brief air attacks and firing artillery bombardments as they prepared for a counter-attack.
[69][70] The Germans forced a 200-yard (180 m) gap in the line between two companies and captured a dozen Australian stretcher-bearers but were unable to bring up reinforcements as British artillery began firing in their rear.
The experienced German storm-troopers checked the drive at first, fighting behind trench blocks but they were eventually overwhelmed by an attack from the flanks, as the Australians assaulted their position with grenades and clubs.
Monash sent Bell his personal thanks, praising the Americans' gallantry, while Pershing set out explicit instructions to ensure that US troops would not be employed in a similar manner again.
[77] They would subsequently play a significant role in the fighting that followed right up until the end of the war, as US reinforcements came to tip the manpower balance in favour of the Allies.