3rd Light Horse Brigade
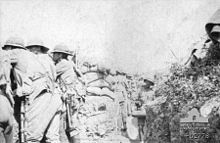
The brigade first saw action while serving with the Australian and New Zealand Army Corps during the Gallipoli campaign where they were noted for their attack during the Battle of the Nek.
That formation was raised in Victoria, and consisted of three Australian Light Horse regiments – the 7th, 8th and 9th – all of which bore the territorial designation of the Victorian Mounted Rifles.
[11] The brigade's first commander was Colonel (later Brigadier General) Frederic Godfrey Hughes, a pre-war officer in the part-time militia.
[13][14] The regiments were pushed into the line around Walker's Ridge and Russell's Top, assuming control of positions previously held by the New Zealanders,[15] and undertook mainly defensive roles throughout the remainder of the campaign.
During this time, the light horsemen undertook patrolling operations, manned outposts, carried out sniping and worked to dig trenches and lay down wire obstacles.
[18] On 27 August, the 9th and 10th Light Horse Regiments were sent as reinforcements to support the attack on Hill 60, which secured a link between Anzac Cove and Suvla.
[7][8][9] The brigade was tasked with holding the line while the evacuation took place; a party of 40 men from the 8th Light Horse Regiment under Lieutenant Colonel Leslie Maygar were among the last to leave.
There were a large number of reinforcements that had arrived in Egypt at this time, and while the infantry was to be deployed to the Western Front, the mounted units were to remain in the Middle East.
[26] In late March, the 8th Light Horse Regiment undertook a reconnaissance patrol to Muksheib to ascertain available water supplies there.
[27] While the defences were built up in the north, the light horsemen undertook a series of raids in the southern Sinai, to channel the Ottoman troops towards the main defensive positions.
Over the period 11–14 April, a squadron from the 9th Light Horse Regiment, along with a small number of men from the 8th Light Horse Regiment,[28] undertook a raid on Jifjafa, advancing 80 kilometres (50 mi) east of the Suez Canal to attack a bore drilling site; the raid proved successful and resulted in the destruction of the well and capture of the small Ottoman garrison force.
[29] By late July an attack on the canal was expected, and the mounted troops were deployed to harass the advancing Ottoman forces.
On the night of 3–4 August, the Battle of Romani began when an Ottoman force ran into positions occupied by the 1st Light Horse Brigade.
2 Section of the canal zone during the initial fighting at Romani, but was hurriedly pushed forward to Dueidar, although this proved too slow to press the advantage.
The troopers advanced on horseback, attempting to rush the defences, but defensive fire checked their efforts and forced them to dismount.
Using fire and manoeuvre techniques, a general advance began but it was carried out over too narrow a front, and after two hours was subjected to a heavy counter-attack.
The heavy resistance resulted in the Anzac Mounted Division being withdrawn to Oghratina, while the 3rd Light Horse Brigade held the left flank around Hod Abu Dhahab overnight.
On 23 December, the brigade carried out a flanking move to the north of the town, to cut off the garrison, while other elements of the Anzac Mounted Division attacked from the north-west.
The 10th Light Horse Regiment, forming the divisional reserve, also helped fill a gap in the line late in the day.
[45][46] Despite some progress in entering the town, the attempt to capture Gaza failed when the order to withdraw was given as night fell due to concerns about the arrival of Ottoman reinforcements.
[50] The Imperial Mounted Division was heavily committed, undertaking several dismounted attacks against two south-eastern redoubts,[51] during which the 3rd Light Horse Brigade was sent against Atawineh.
[58][59] The breakthrough at Beersheba paved the way for the opening of the Southern Palestine Offensive;[60] after Gaza was captured, the brigade took part in the pursuit of the withdrawing Ottoman forces and the advance towards Jerusalem,[7][8][9] during which they played a supporting role in actions at Haeira and Sheria and Mughar Ridge, as the Australian Mounted Division advanced towards Summil.
[7][8][9] During the action, the brigade forced a crossing around Damieh and then drove towards Es Salt, where a charge by the 8th Light Horse Regiment secured the town.
[64] Summer was spent by the Jordan River amidst oppressive heat and vector borne diseases, during which there was a lull in the fighting.
On 21 September, the brigade took part in the capture of Jenin, during which they drew swords to rout a large group of Ottoman troops that had been fleeing the battle zone.
[70] The brigade then advanced from Nazareth to capture Tiberias, near the Sea of Galilee, where they fought a brief action against withdrawing rearguard forces.
[74] After the conclusion of hostilities, the Australian Mounted Division undertook occupation duties in Tripoli, near the coast, until it returned to Egypt in early 1919.
[80] In the first couple of years after the war, plans were made to reorganise the home forces to meet the needs of peacetime while providing a strong base upon which to mobilise if necessary.
By 1921, when the AIF was officially disbanded, plans were approved to raise two cavalry divisions, each of three brigades, utilising a mix of voluntary enlistment and compulsory service.